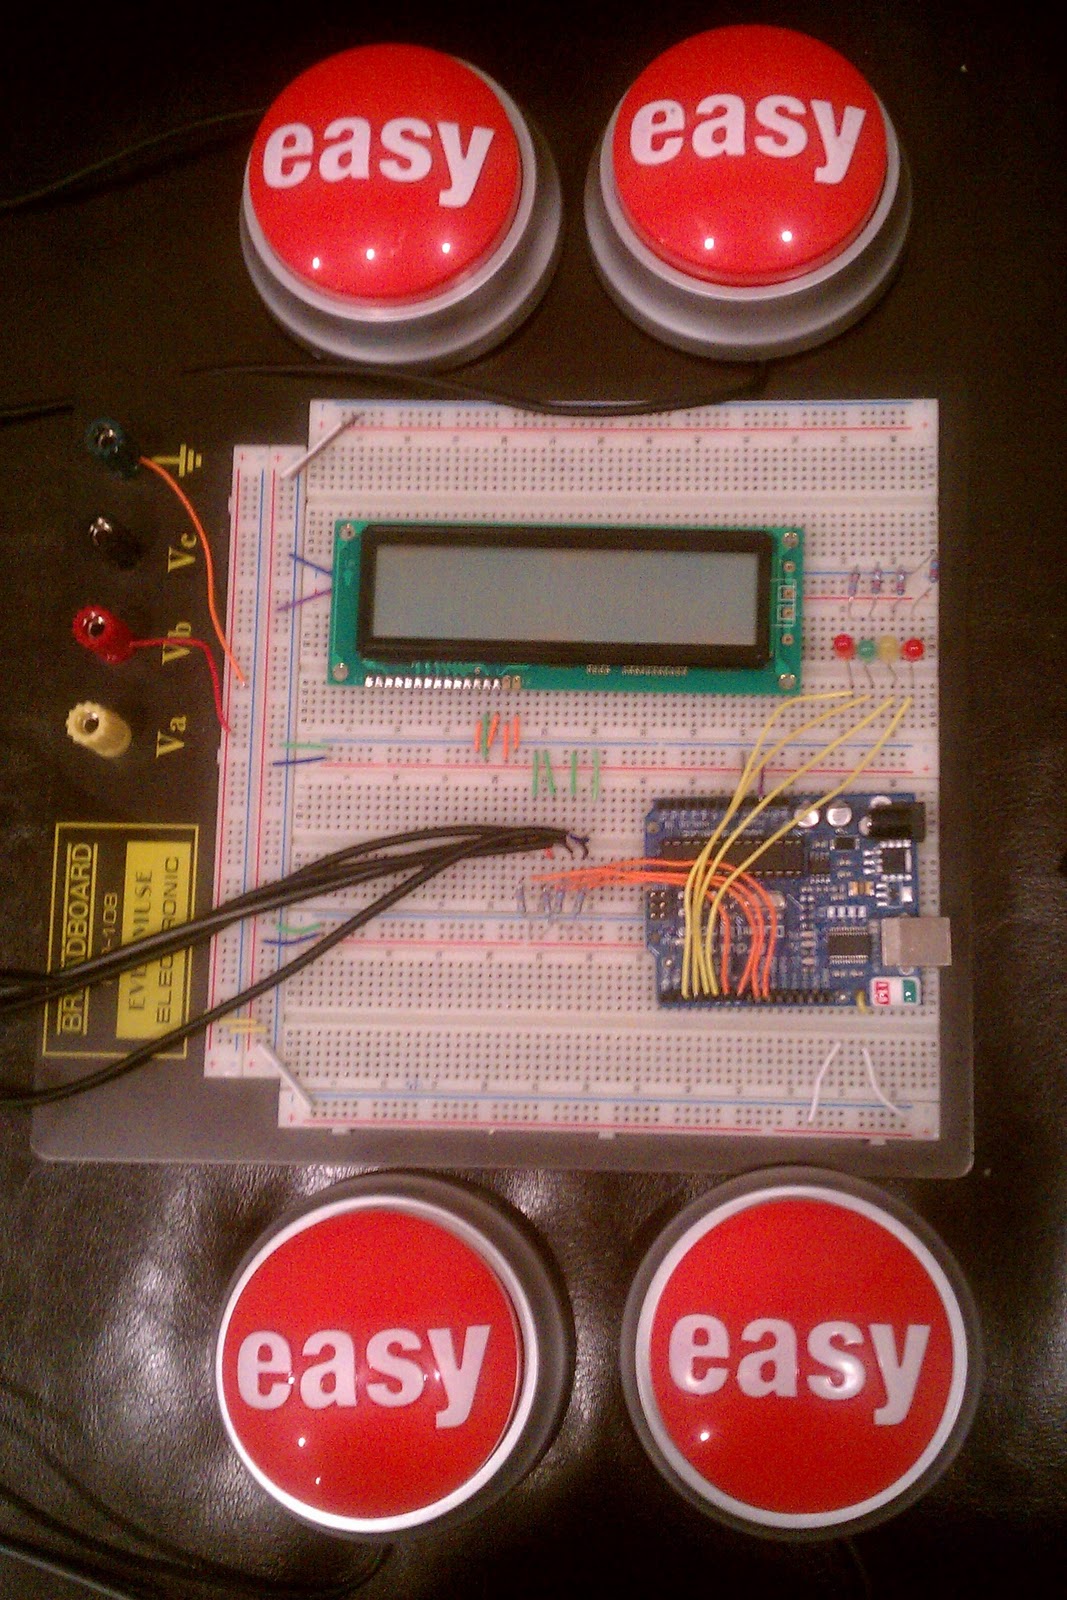
No Dremel or real electrical knowledge required. LCD is there because I have it pretty much attached to the board.
I made this for a class that my boyfriend was teaching at Northwestern for mostly kids in the Chicago Public School system about GAME SHOWS! We wanted to have the kids play plenty of them so that they can win cash (we had about $500 we were ready to give away) or Fabulous funny Prizes from the Dollar Store for just participating like the item below or books like “Fails to Meet Expectations” all in good fun. If you would like digital copies of the games we played (all programmed by Stev-o of Stev-o.us) which can be made with any questions or prizes listed on the screen just like the originals (Assasin, Survey Says, Lucky Roller, Joker’s Crazy Slots, etc. *names changed due to licencing*) please contact Stev-o at Stev-o.us and they must be used for non-profit or family fun!
Back to the controller…
Parts:
– BreadBoard
– Precut Wire package
– 4 long pieces of 2 Channel Wire ( I used old cut up headphone cables)
– 4 resistors of anywhere from 10k-100k value will work
– 4 resistors of 3k-10k depending on brightness desired
– 4 LEDs you have laying around
– One Arduino Board or MSP430 using EasyMSP
– 4 EasyButtons from Staples (can also use push lamps from the dollar store)
– Computer with USB (program also spits back out which player clicked in first).
Cost ranges from $20 – 50 depending on what you have on hand. I had all of this at home and most other parts can be bought at RadioShack or even Ace Hardware or all pieces from Adafruit or Sparkfun.
Circuits

Inside of the EasyButton

Wire Hookups

Pictures of the Working Item!

You can Add a buzzer using the tone command and one of the free PWM pins, but I didn’t just because of the noise level in the room would have made it not loud enough. Use an old headphone speaker or good one out of a broken pair. Reseting the system is just using the RESET pin on the Arduino Board.
This is yet another reason for keeping a couple cheap development boards on hand!

0 Comments