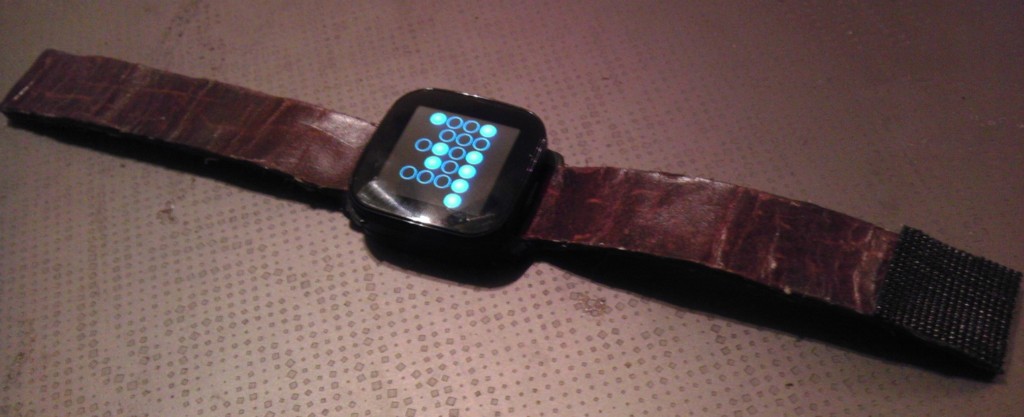
I decided that after I got the new watch mount for my Sony LiveView , I would get a much nicer watchband (new holder is no longer hollow in the back). However, there are almost NO WATCHBANDS in the same size as the Sony band. Plus a nice leather watchband is easily $30 and you have to wait for it to get there. Made my own that night out of stuff I had in the house and its the most comfortable watchband I own.
Materials:
– Scrap Leather or “Pleather”
– Hot Glue and a Hot Glue Gun
– Scissors
– Paper
– Velcro
– Candle (only if you want a worn-in vintage look)
1. Measure your wrist (you can just cut a strip of paper and warp it around your wrist). Add about 2/3 of an inch to the end of it.
2. Measure the watch band width needed (again just use the paper).
3. Make a Strip of paper the same size as length of step 1 and width of step 2.
4. Lay that strip of paper on the backside of some leather/pleather and trace it on there in two locations.

5. Cut out that pattern.
6. Slip one strip of leather in the gap between the pin and the watch face on each side and fold it over.
7. Now just glue the two sides together with hot glue. Put plenty of pressure on it while it sets so there is no visible gap (don’t worry about the glue that is comming out the sides, we will be using it later)
8. Now take two strips of opposing velcro about an inch long and glue them to the leather (might want to rough up the leather so it will stick better ) so that they will overlap and stick.
9. That extra glue that popped out the sides? Just smooth it out against the side of the watchband in a thin layer. This will protect the sides of the leather band, help it stay together, and look a lot nicer.
Congrats you made your own watch band!
It will become more and more comfortable over time since the leather/hot glue combo will eventually mold itself to your exact wrist shape. The thickness of the leather and the band also makes it so it will not stretch much, repairs are easy, sizing is completely adjustable. Velcro is much more comfortable on your wrist than the buckles used with most every leather band. Cost is less than $1.
If you want that vintage/worn look:
1. First start pulling and bending your new watchband in all directions. 
2. Light a Cheap Tea light candle or any candle.
3. After the candle has made a decent little pool of wax, dip a finger or q-tip in the wax and start rubbing it against the leather of your watchband. Repeat until all areas done.
4. Rub it until shiny!
5. Rough it up by bending/twisting/scratching. Then rub out the light damage. This will give it many shades and have it look vintage or very high end or both!
Scraps can be treasures too!


0 Comments